

The cropped jacket version of this pattern has become my signature outerwear. I first made this a couple of months ago (and wrote a blog post on it for The Rag Shop. Having made another since then (and with the fabric for a third one going into the prewash) I thought it was worth chronicling here on She Sews Happiness.
The Princess coat pattern is inspired by the Lilli Ann style of coats of the 1940s and 1950s. The Lilli Ann label was established in San Francisco in 1934 by Adolph Schuman who named the company after his wife. It became known for creating beautiful, elaborately designed suits and coats and they were featured regularly by Vogue.

Schuman bought the majority of his fabrics in Paris from small textile companies that were in financial straits after the war; reportedly, his business saved many of them from financial ruin.

The joy of Lilli Ann garments is in the details. The architectural styling of the clothes is beautiful, so it is no wonder Gertie was inspired to recreate the look with The Princess Coat.
The Pattern
The Princess Coat features Princess seams, a fabulous shawl collar (with the option of a notch detail), 3 interchangeable sleeve options (a tailored sleeve, a bell sleeve and a lantern sleeve) and can be made in various lengths (a cropped jacket, jacket with peplum, or a full-skirted coat).
In a way it reminds me of those ‘Red Herring’ books I read as a child. Gertie describes it as a ‘Choose Your Own Adventure’ pattern – there are actually 24 different combinations.

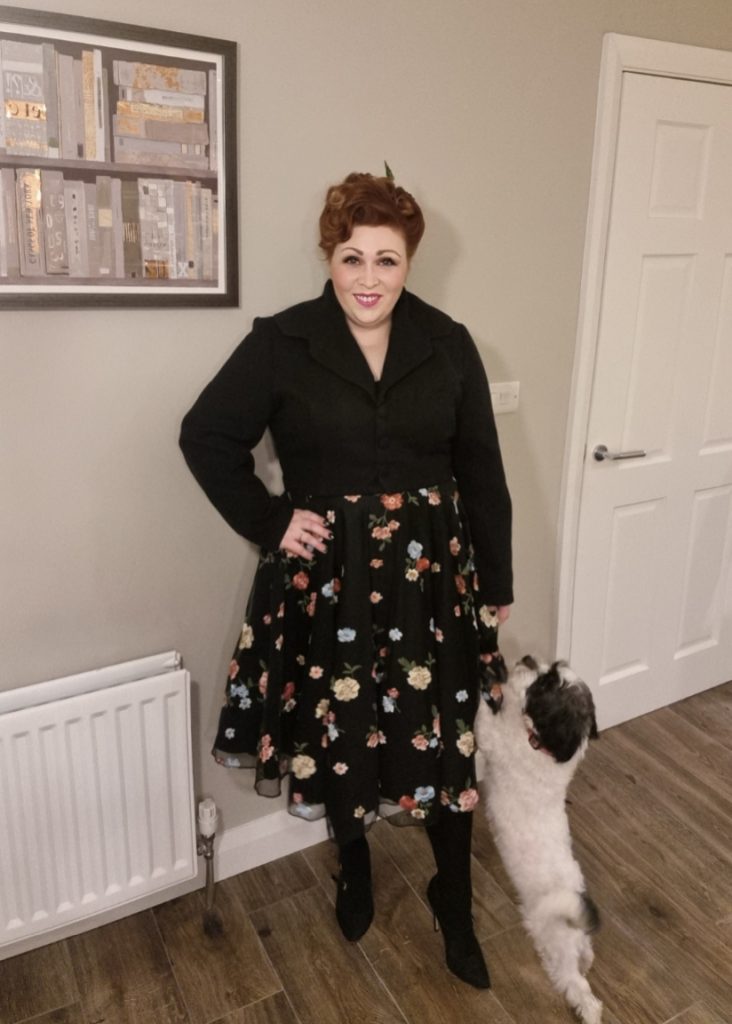
While the decision was difficult, in the end I chose to make the cropped jacket with tailored sleeves and left out the notch on the collar as I loved the dramatic circular sweep of the shawl collar.
Toile & Fit
I’m a big believer in making toiles for patterns I haven’t made before – no matter what version of the coat you make, you only need to toile this pattern as a cropped jacket as the peplum and skirt don’t require any fitting.
To choose your size, the key measurement you want to focus on is your high bust – Charm Patterns come with cup sizes (A-H) so this part of fitting is effortless, even for the bustier among us. I started with a size 12 as my high bust measurement, grading out to a 14 at the waist.

Being princess seams, I only graded out at the side seams (not all the princess seams). A lot of people who ask me for advice on fit make the same mistake when choosing their sizes; they often use their waist measurement to decide which size to make in the case their waist is a size or two larger than their bust. The problem with this is that you end up with a lot of excess fabric around the shoulders and bust area. It is easier to grade out at the waist than it is to get rid of excess fabric everywhere else.
I also prefer to make my toiles from calico rather than making wearable muslins – Gertie herself advises against them. I didn’t make any massive adjustments in the end. I increased the side seams at the top of the jacket as there was a bit of excess but to go down a cup size would have made it too small and I wanted to leave enough room for an extra layer of knitwear when the weather turns bitterly cold. I also had to shorten the arms a little and redraft the shoulder seams a little. I was surprised I didn’t have to do a bicep adjustment on the sleeves as that is a common adjustment I need to make, especially having opted for the tailored sleeves.
Garment Construction
The jacket came together really easily in spite of it being made up of quite a lot of pattern pieces (and I was making the shortest of the versions).

I did skip one major feature, however: the bound buttonholes. After a test, I realised that this fabric wasn’t well suited for this technique. The fabric I used from The Rag Shop was a large houndstooth pattern (the fabric composition is 90% polyester and 10% wool) which was quite loosely woven. It would be much easier in a tweed or wool; something more rigid and stable. Instead of the bound buttonholes, I used invisible closures which I think works really well given the giant houndstooth doesn’t get broken up or ‘cluttered’ by buttons. It’s a satisfyingly clean finish.


What I love about this pattern is that it can be used to make a really authentic looking princess coat, but what I hope to show by sharing this version of the coat is that the pattern can also be used to create something more ‘modern vintage’ for everyday wear. While my wardrobe is trousers-free, I think this version would look as beautiful with a pair of jeans as it does a swing skirt.

I knew as soon as I had finished making this jacket that I would need another one – while I loved the jumbo houndstooth print and the colours of this coat, admittedly I have very few plain garments in my wardrobe so I would be limited as to what I could wear with this coat.
I purchased some vegan wool coating from Fabric Godmother in plain black and set about making another – I opted this time to make the notched collar as the fabric could handle more manipulation than the loose weave of the first jacket.
Just like the first manifestation, I also chose not to do the bound buttonholes (for two reasons):
- I didn’t have any organza and had no quick way of acquiring any (what with holiday postal delivery times)
- The fabric’s composition meant that ordinary buttonholes would be well lasting anyhow.
I used some black fabric from my stash to make some self-facing buttons (the vegan wool was too thick so I opted for some ponte roma scraps which stretched around the buttons easily).

This version goes with the majority of my wardrobe so it was definitely worth making a second one.
To make a third one might seem just a little obsessive; nevertheless, I purchased some red ex-Ted Baker deadstock wool and baby pink wool blend from Rainbow Fabrics over the Christmas holidays and I plan to make another from one of these (I’m not sure what the other one will become).
1 comments on “Charm Patterns, Princess Coat”