
I’ve been MIA for most of this year – turns out having a baby becomes all consuming and I rarely want to spend time in the sewing room when I can enjoy Henry snuggles and playtime instead.
Saying that, necessity has caused me to make a few new garments; because time is limited, when I fitted the Fringe dress and loved it so much (with the bonus of being breastfeeding friendly) I made a few of them rather than trying to make time to toile a multitude of patterns. I’ve always been a bit of a pattern repeater, anyhow. Even when I was purchasing RTW clothing up until I started sewing three years ago, I often found myself buying the same style in various fabrics. When it works, it works!
The Fringe pattern is a woven dress and blouse with two views. View A has a button up front, elbow sleeve and sleeve tab. View B has a pull over, notched front with a cuff. Both views include two cup sizes in sizes 0-30, optional waist ties, and the sleeve/cuffs are interchangeable.

The dress is designed to be made with a light to medium weight woven fabric; I’ve made it in a few different fabrics which I will share later in this post. Having made this dress before – pre-pregnancy – you’d be forgiven for thinking this was a straightforward make for me, but my postpartum measurements are totally different to what they were when I first made this pattern (particularly at the bust thanks to nursing) so I was starting from scratch. Most of the work is done by the fact that the pattern is drafted for a A/B and C/D cup – while I am usually a dressmaking F cup, there is enough ease in this pattern that I only had to perform a 1 inch FBA (½” on the front pattern piece). There is quite a lot of ease built throughout the pattern so, depending on how much ease you prefer (or do not prefer), you may get away with sizing down in this pattern from where your measurements place you on the chart.
This pattern is really well drafted – other than the FBA, I made no modifications to it. The fact that the dress has ties which can be inserted into the back darts or side seams and the style of the sleeves make it easy to fit and a pretty straightforward sew. While the pattern is geared towards intermediate sewists, there is no reason why an adventurous beginner cannot take this on; I was a beginner sewist when I first made it. The instructions are incredibly clear and well written, too, so I would have no hesitation recommending this pattern to beginners. It isn’t the fastest sew but it comes together quite easily. One change I made (not fitting related) was to widen the ties a little; because this fabric is liable to fray, I made it a little wider to make it easier to turn out and also to make it easier to edgestitch the ties.
There are so many lovely features to this pattern. I love the neckline, the cuffed dolman sleeves, the sleeve tab and the curved hem (however, I usually make it with a straight hem so I do not have to even out the curve when lighter fabrics inevitably drop. for this version to make the evening of the hem straightforward, so I evened out the pattern piece and cut accordingly). I was worth making every single one I’ve made as they’ve been worn again and again.
Version 1 – made in Eco-vero crepe from Fabric Godmother (I adore this fabric, gifted to me by Jenny Stitches for the blog)

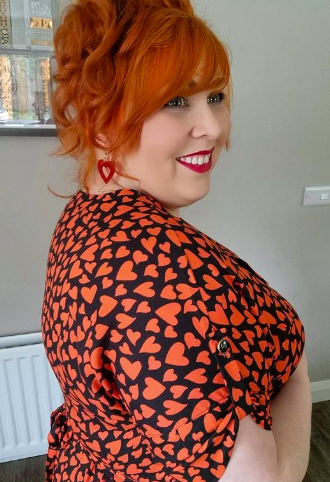
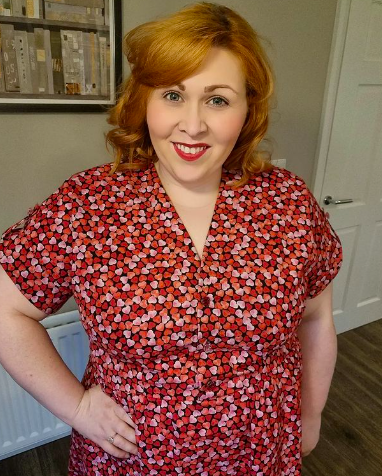
Version 2 – cotton poplin Rose and Hubble heart print that was in February’s Sew Hayley Jane box
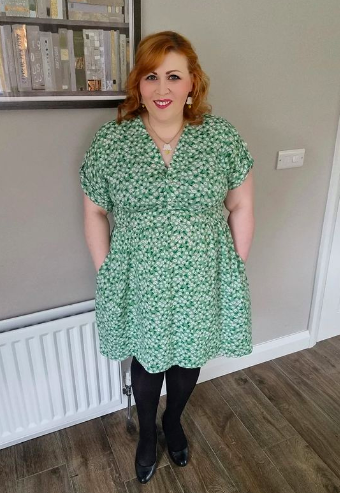
Version 3 – green floral viscose from Fleur et Ours (this was made for St Patrick’s Day as none of my green dresses fitted yet)
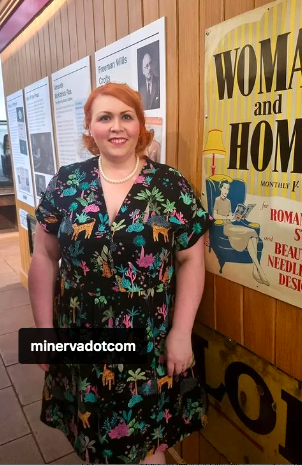
Version 4 – Minerva exclusive viscose print
Version 5 – navy foiled double gauze from Jenny Stitches (this has been a godsend in the hot spell we have been having)

There may be another one on the sewing table while I type…